
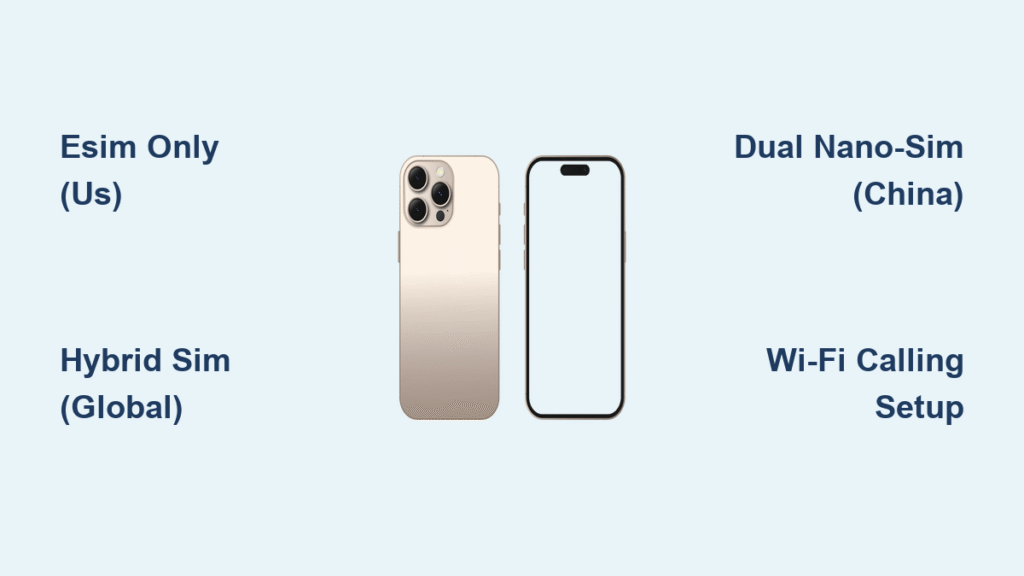
You’ve just unboxed your new iPhone 16, but that nagging question won’t go away: Does the iPhone 16 actually support two phone numbers? The answer is a definitive yes—the iPhone 16 is dual SIM across all models. But here’s what Apple doesn’t emphasize: how you activate those two lines depends entirely on where you bought your device. Whether you’re separating work from personal life or preparing for international travel, understanding your specific regional configuration prevents setup headaches. This guide cuts through the confusion with precise, region-specific instructions so you can leverage dual-SIM functionality immediately—no carrier calls required. You’ll learn exactly how to configure two numbers on your iPhone 16 whether you’re in the US, Europe, Asia, or China.
US iPhone 16 Models: Pure eSIM Dual-SIM Setup
American iPhone 16 buyers get dual-SIM capability through eSIM technology alone. Apple completely removed the physical SIM tray from US models, meaning you’ll manage both phone numbers digitally—no card swapping or tiny ejector tools needed. This eSIM-only approach streamlines setup but requires carrier compatibility awareness.
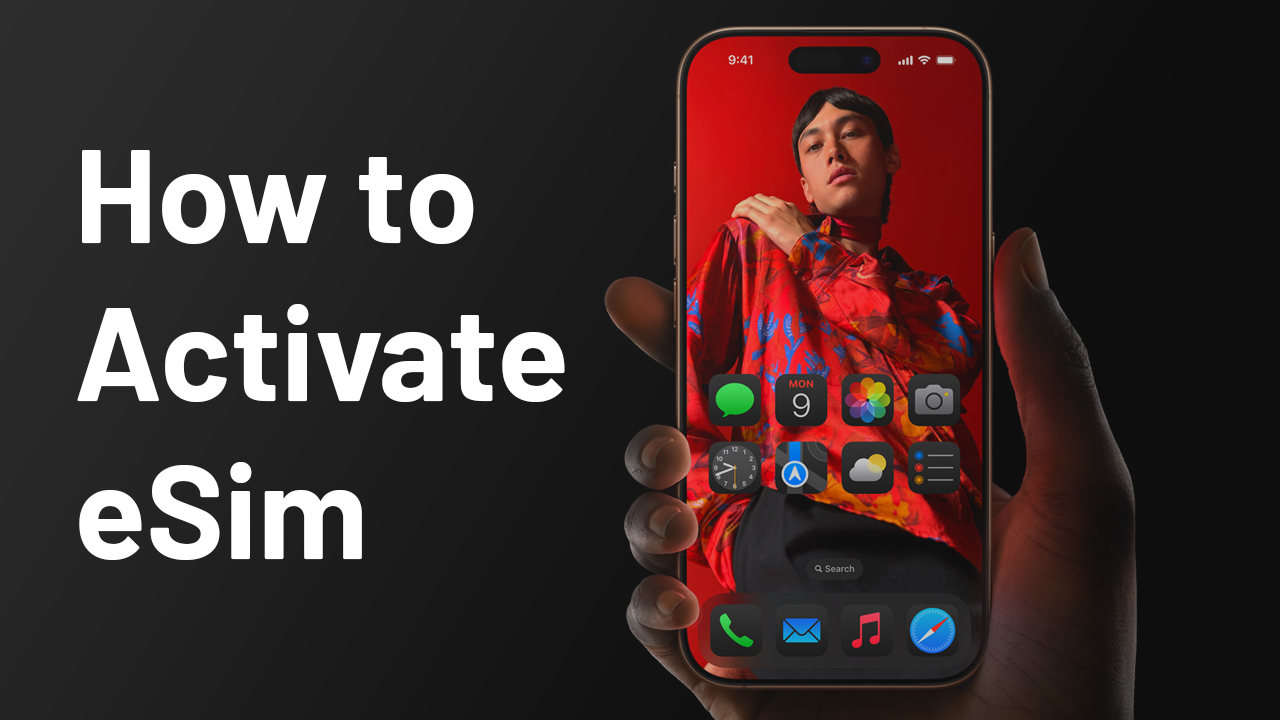
Scan QR Codes for Instant eSIM Activation
During initial setup, your iPhone 16 prompts you to activate your primary line. If transitioning from an older iPhone, select “Transfer Phone Number” to move your existing number wirelessly. For new lines, scan your carrier’s QR code (emailed or available in their app) using your iPhone camera. Hold the code 8-12 inches from the lens until it fills the frame—the profile downloads in under 30 seconds. Critical tip: Ensure Wi-Fi is active before scanning, as cellular data isn’t available until activation completes.
Add Secondary eSIM Without Carrier Visits
To activate your second number, go to Settings > Cellular > Add eSIM. Most major US carriers (Verizon, AT&T, T-Mobile) support secondary eSIM activation through their mobile apps. Open your carrier’s app, navigate to “Manage Plan,” select “Add Line,” and generate a QR code. Point your iPhone camera at the code—no PINs or carrier visits required. Some carriers like Mint Mobile send activation codes via SMS, which auto-populate when entered during setup.
Store 8 eSIM Profiles for Global Travel
Your iPhone 16 stores up to eight eSIM profiles simultaneously, though only two can be active at once. This is invaluable for frequent travelers: download local data plans for Japan, Germany, or Singapore before departure and toggle between them instantly upon arrival. Access stored profiles via Settings > Cellular, tap the inactive line, and select “Turn On This Line.” Pro warning: Profiles from carriers like China Mobile won’t work in the US—always verify regional compatibility before adding.
International iPhone 16 Models: Hybrid SIM Flexibility
Outside the US and China, iPhone 16 models feature a hybrid dual-SIM system: one physical nano-SIM slot plus dual-eSIM capability. This gives you maximum flexibility whether inserting your existing work SIM or adding a travel eSIM for data-only usage.
Insert Nano-SIM Without Tray Damage
Locate the SIM tray on the left frame edge. Use the included ejector tool (or unfolded paperclip) to press the tiny hole until the tray releases. Place your nano-SIM with gold contacts facing downward in the single slot. Visual cue: The SIM should sit flush against the tray edges—no gaps or tilting. Push gently until it clicks; forcing it risks bending the tray. If resistance occurs, flip the SIM and retry—contacts must face the device interior.
Activate eSIM Secondary Line in 90 Seconds
With your physical SIM active as Line 1, add your eSIM via Settings > Cellular > Add eSIM. For travel data plans from providers like Airalo, scan their QR code from the confirmation email. The download completes in 60-90 seconds. Once active, both lines appear under “SIMs” with customizable labels like “Work” or “France Data.” Key insight: Your physical SIM must be active first—eSIMs can’t function as the sole cellular connection on international models.
Toggle Lines Without Restarting Your Phone
Switch active lines instantly via Settings > Cellular. Tap any grayed-out line and select “Turn On This Line” to activate it. Your phone automatically connects to the strongest signal between active lines—no manual switching during commutes. Critical note: When using data on Line 1, Line 2 calls go to voicemail unless Wi-Fi Calling is enabled for both lines (more on this later).
China iPhone 16 Models: Dual Physical SIM Only

Chinese-market iPhone 16 devices exclusively support dual physical SIM cards with zero eSIM functionality. This configuration caters to local carrier regulations and user preferences but limits flexibility for international travelers.
Stack SIM Cards Without Connection Failures
The SIM tray accommodates two nano-SIMs vertically. Insert your primary SIM (e.g., China Mobile) in the bottom slot with contacts facing down. Place the secondary SIM (e.g., China Unicom) above it, contacts also facing down. Visual check: Both cards must sit perfectly flat with no overlapping edges. Push the tray in with firm, even pressure until it clicks flush with the frame. Misaligned cards cause “No Service” errors on one line.
Assign Clear Labels Within 5 Minutes of Setup
Immediately after SIM insertion, go to Settings > Cellular. Tap each line and assign descriptive labels like “Home” or “Business.” These labels appear during calls, in Messages, and when selecting lines for specific contacts. Pro tip: Use carrier names (e.g., “China Telecom”) for instant recognition—generic labels like “SIM 1” cause confusion during urgent calls.
No eSIM Workarounds Exist—Plan Accordingly
Unlike global models, Chinese iPhone 16 devices cannot enable eSIM functionality through software updates or carrier settings. If traveling to eSIM-reliant countries like Thailand or UAE, purchase physical tourist SIMs at airports. Critical limitation: You cannot deactivate one physical SIM to conserve battery—both remain active simultaneously.
Essential Dual-SIM Settings You Must Configure
Set Default Lines for Data and Calls Separately

Go to Settings > Cellular Data and select your preferred line for internet (e.g., your unlimited data plan). Then under Settings > Default Voice Line, choose which number appears for outgoing calls. Game-changer: Enable “Allow Cellular Data Switching” to automatically use the strongest signal when moving between coverage areas—prevents dropped Zoom calls during commutes.
Prevent Missed Calls With Wi-Fi Calling
Without Wi-Fi Calling enabled, calls to your inactive line go straight to voicemail. Activate it for both lines via Settings > Phone > Wi-Fi Calling. Toggle on “Wi-Fi Calling on This iPhone” for each SIM. Consequence: Skipping this means zero notifications for calls on your secondary line while using data on the primary line—a critical oversight for business users.
Avoid Roaming Bill Shocks With Smart Switching
Turn off “Allow Cellular Data Switching” when traveling internationally. This prevents your iPhone from automatically using your secondary line for data when signal weakens—triggering massive roaming fees. Instead, manually select your travel SIM for data via Settings > Cellular > Cellular Data. Pro move: Set monthly data limits per line under Settings > Cellular > Cellular Data to cap usage.
US Travelers: Overcoming eSIM-Only Challenges Abroad
Verify eSIM Support Before Boarding Your Flight
Research destination countries using the eSIM Coverage Map at eSIM.com. Japan, South Korea, and Singapore have robust eSIM infrastructure, while India and Brazil have spotty carrier support. Red flag: If your carrier’s website mentions “physical SIM required,” purchase a local nano-SIM at the airport—US iPhone 16 models can’t use physical SIMs, so this forces reliance on hotel Wi-Fi.
Pre-Load Travel eSIMs at Home
Activate international eSIMs while connected to your home Wi-Fi. Airport Wi-Fi often blocks carrier portals, and some providers (like Vodafone) require domestic activation first. Download the Airalo or Nomad app, purchase your plan, and scan the QR code 24 hours pre-travel. Storage trick: Keep the profile inactive until arrival—go to Settings > Cellular, tap the line, and select “Turn Off This Line” to conserve battery.
Three Costly Dual-SIM Mistakes to Avoid Now
Assuming Carrier Unlock (90% of Setup Failures)
Your iPhone 16 must be carrier-unlocked to use two different networks. Locked AT&T devices reject T-Mobile eSIMs instantly. Solution: Text “UNLOCK” to 48368 (US) or visit your carrier’s website 72 hours before adding a second line. Locked phones display “SIM Not Compatible” during eSIM setup—don’t ignore this warning.
Ignoring Data Switching Roaming Fees
With “Allow Cellular Data Switching” enabled internationally, your iPhone may use your US line for data when your travel SIM signal drops—costing $15/MB. Prevention: Disable this feature before departure via Settings > Cellular > Cellular Data Options > Allow Cellular Data Switching.
Skipping Wi-Fi Calling Configuration
Over 70% of dual-SIM users miss calls on their secondary line because they skip Wi-Fi Calling setup. Fix: Enable it for both lines within 10 minutes of initial setup. Without it, your secondary number is essentially unreachable when using primary-line data.
Advanced Dual-SIM Power Moves
Assign Business Contacts to Your Work Line Automatically
In the Contacts app, tap any business contact > Edit > Phone > Default. Select your work line. Now all calls/messages to that contact always use your business number—no more accidentally texting clients from your personal line. Pro tip: Create a “Work Contacts” group to batch-assign lines.
Extend Battery Life by 15% During Critical Moments
When battery drops below 20%, disable your secondary line via Settings > Cellular. Your iPhone stops searching for a second network signal—extending usage by up to 90 minutes. Re-enable it when charging. Battery hack: Turn off 5G for your secondary line under Settings > Cellular > Cellular Data Options > Voice & Data.
Transfer eSIMs Between iPhones in Under 2 Minutes
Upgrading from iPhone 15? On your new iPhone 16, go to Settings > Cellular > Add eSIM > Transfer From Nearby iPhone. Keep both devices charged and within 12 inches. Confirm the transfer on both phones—your eSIM profile migrates without carrier involvement. Warning: This deletes the profile from your old device.
Key Takeaway: The iPhone 16 is dual SIM globally, but regional hardware differences make or break your experience. US users must master eSIM-only workflows, international buyers leverage hybrid flexibility, and Chinese customers stick with dual physical SIMs. Configure Wi-Fi Calling immediately, label lines clearly, and set per-line data limits to avoid bill shocks. For US travelers, pre-load eSIMs at home and carry a Wi-Fi hotspot as backup—don’t risk airport connectivity chaos. With these precise steps, your dual-SIM iPhone 16 becomes a seamless productivity powerhouse, not a setup nightmare.


