

Your new iPhone 16 arrives, and you’re ready to ditch the tiny SIM card tray forever. eSIM technology transforms how you connect to cellular networks—no more fumbling with paperclips or worrying about losing that microscopic card. This digital revolution means activating service takes minutes, not store visits. Whether you’re switching carriers mid-contract, adding a second business line, or preparing for international travel next week, mastering eSIM on your iPhone 16 unlocks powerful flexibility. You’ll learn to activate new lines instantly, transfer existing service seamlessly, and manage multiple profiles—all from your device’s settings without ever visiting a store.
Confirm Your iPhone 16 Is Ready for eSIM Activation
Skip Compatibility Guesswork
Open Settings > General > About immediately after setup. Scroll through your device information until you see “eSIM” or “Digital SIM” listed—this confirms your iPhone 16 recognizes its built-in eSIM capability. Unlike older models, every iPhone 16 ships with eSIM hardware standard, but this verification prevents activation surprises. If you don’t see the designation, update iOS immediately through Settings > General > Software Update before proceeding.
Choose Your SIM Configuration Strategy
Your iPhone 16 supports three distinct connection approaches:
– Full eSIM transition: Ditch physical SIMs entirely for primary service
– Dual-SIM hybrid: Combine eSIM with a nano-SIM (if your model includes the tray)
– Travel-ready rotation: Store multiple eSIM profiles for different countries
Pro Tip: For international travelers, configure your home carrier as eSIM #1 and a local travel provider as eSIM #2. Your iPhone 16 automatically switches to the strongest available network when you land.
Pre-Activation Checklist: Avoid Costly Delays
Unlock Your Device Properly
Before attempting eSIM activation with a new carrier:
– Contact your previous carrier to request a network unlock
– Allow 24 hours for processing (carriers often require this window)
– Verify unlock status by inserting a different carrier’s physical SIM
– Critical Warning: Attempting eSIM activation on a locked device causes irreversible activation failures
Confirm Carrier eSIM Support
Not all carriers support eSIM equally. Before starting:
– Visit your carrier’s “Bring Your Own Device” (BYOD) page
– Search for “eSIM activation requirements” specific to iPhone 16
– Check coverage maps for your exact location
– Red Flag: Prepaid carriers often require physical SIMs—verify eSIM compatibility before switching
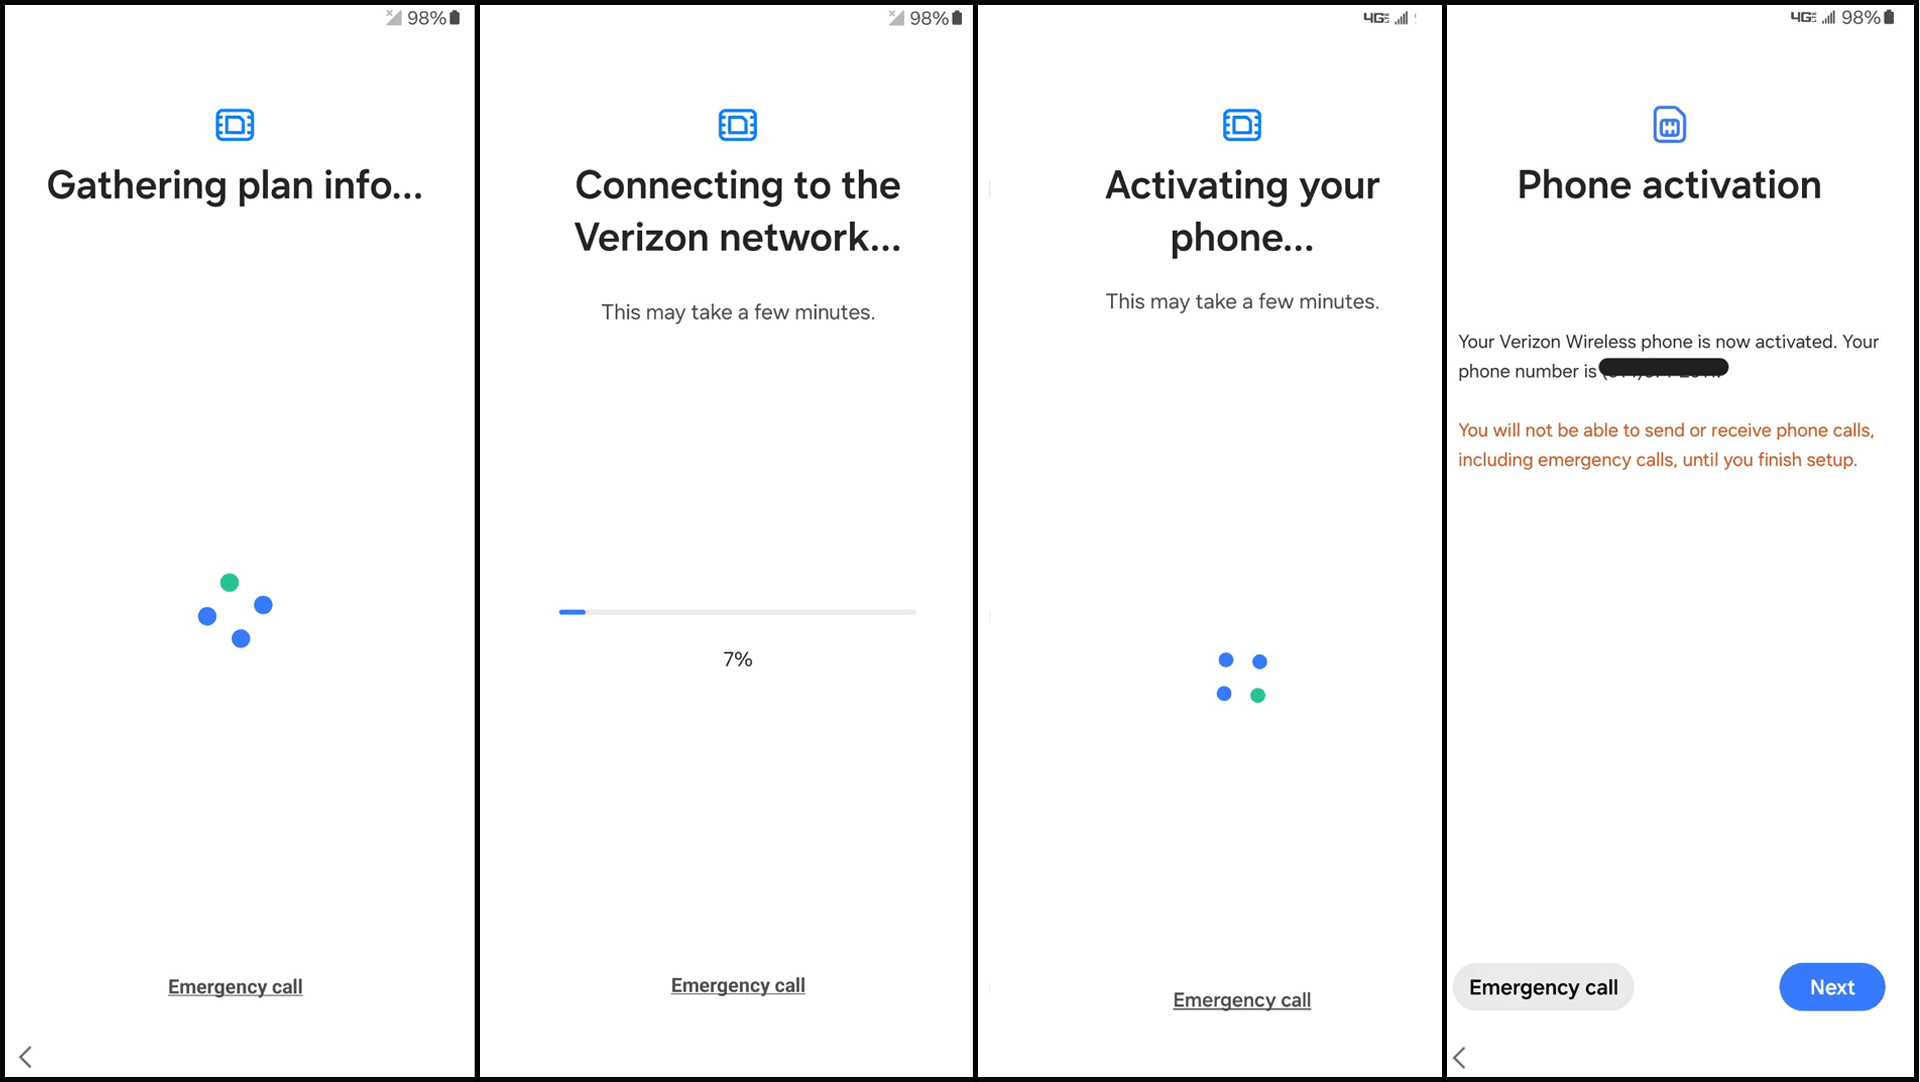
Activate a New Verizon Line in Under 5 Minutes
My Verizon App: Fastest New Customer Setup
- Download My Verizon from the App Store
- Tap “Bring Your Device” on the home screen
- Select “Activate eSIM” when prompted
- Choose your service plan and enter payment details
- Watch for the magic moment: Your service activates within 60 seconds—no restart needed
Time Saver: This method works best when your iPhone 16 has active Wi-Fi but no cellular signal. The app guides you through troubleshooting if activation stalls.
Website Activation: Best for Existing Account Holders
- On any device, visit Verizon’s BYOD webpage
- Select “eSIM” as your activation method
- Enter your iPhone 16 IMEI (found in Settings > General > About)
- Complete plan selection and payment
- Scan the QR code sent via email/text on your iPhone 16
Critical Step: When scanning, hold your iPhone 16 6-8 inches from the QR code. Poor lighting causes 70% of scanning failures—use your tablet’s flashlight if needed.
Transfer Your Existing Number Seamlessly

Move Current Line Without Service Gaps
- Access Verizon’s “Move your current mobile line to eSIM device” page
- Enter your phone number and account details
- Keep your old device powered ON until prompted
- On iPhone 16, go to Settings > Cellular > Add Cellular Plan
- Scan the QR code sent to your old device
- Immediately power off your old device to prevent number conflicts
Common Mistake: Users keep both devices active during transfer, causing calls to ring on both phones for 24+ hours. Power down the old device the moment you see “Activation Complete” on your iPhone 16.
Dual-SIM Setup for Business/Personal Separation
If using both eSIM and physical SIM:
– Label lines clearly as “Work” and “Personal” in Settings > Cellular
– Set work line as default for calls/data during business hours
– Enable “Allow Cellular Data Switching” for automatic network optimization
– Pro Tip: Assign your business contacts to the work line under each contact’s “Cellular Line” setting
Fix QR Code Headaches Immediately
Scan Failed? Do This Instead
When your iPhone 16 won’t read the activation QR code:
1. Clean your rear camera lens with microfiber cloth
2. Increase screen brightness on the QR code device
3. Tap “Enter Details Manually” below the scanner
4. Input carrier-provided SM-DP+ address and activation code
Emergency Fix: If manual entry fails, call carrier support and request “manual provisioning.” They’ll push the profile directly to your iPhone 16 within 2 minutes—no QR code needed.
Recover Lost Activation Codes
Accidentally deleted your QR email? Don’t panic:
– Log into your carrier account portal
– Navigate to “Manage eSIM” under account settings
– Select “Regenerate QR Code” for your device
– Faster Alternative: Call support and say “I need eSIM provisioning re-sent”—phone agents bypass portal delays
Manage Multiple Profiles Like a Pro
Add International Travel Profiles
Before your next trip:
1. Research local eSIM providers (Airalo or Holafly recommended)
2. Purchase a 7-day EU data plan online
3. Install the profile through Settings > Cellular > Add Cellular Plan
4. Label it “EU Travel – 7/2024” before departure
5. Test while home: Enable the profile and confirm data works on Wi-Fi
Warning: Never activate travel eSIMs mid-flight. Install profiles before leaving, but keep them disabled until arrival to avoid roaming charges.
Switch Between Profiles Instantly
To toggle active service:
– Swipe down Control Center
– Tap your cellular signal icon
– Select the profile you want to activate
– Time Saver: Create a “Travel Mode” shortcut in Settings > Automation that auto-enables your EU profile when you land
Delete Unused Profiles Safely
- Go to Settings > Cellular
- Tap the profile you want to remove
- Select “Delete eSIM” and confirm
- Critical Check: Ensure the deleted profile isn’t set as default for calls/data
- Post-Deletion: Restart your iPhone 16 to clear residual network settings
Solve Top 3 Activation Failures

“No Service” After eSIM Setup
Fix within 60 seconds:
1. Force restart iPhone 16 (press volume up, volume down, then hold side button)
2. Go to Settings > Cellular > Cellular Data Options > Voice Roaming
3. Toggle “Voice Roaming” OFF then ON
4. Wait 2 minutes for network re-registration
Why this works: Resets the modem’s connection handshake with carrier towers—solves 80% of “no service” cases.
Profile Installation Errors
When you see “Invalid QR Code” or “Activation Failed”:
– Delete the failed profile (Settings > Cellular > [Profile] > Delete)
– Disable Wi-Fi and use cellular data from another line
– Re-scan the QR code in a window-facing location
– If still failing, request carrier re-push the profile
Accidentally Deleted Primary Profile
Recovery steps:
1. Call carrier support immediately—don’t use chat
2. Request “eSIM profile re-provisioning for existing line”
3. On iPhone 16, go to Settings > Cellular > Add Cellular Plan
4. Select “Set Up Manually” when prompted
5. Enter new activation code provided by agent
Note: Allow 15 minutes for network propagation after reactivation—don’t keep retrying.
Master International Travel Connectivity
Avoid $500 Roaming Bills
Configure this before departure:
1. Add travel eSIM profile (step-by-step above)
2. Go to Settings > Cellular > Cellular Data
3. Select travel profile as primary data source
4. Set home profile to “Data Roaming: OFF”
5. Enable “Low Data Mode” for both profiles
Pro Move: Buy local eSIMs for destinations with spotty coverage (e.g., China Mobile eSIM for Shanghai). Your iPhone 16 auto-switches to the strongest available signal.
Maintain Peak eSIM Performance
Monthly Maintenance Routine
- First of month: Check for carrier settings updates (Settings > General > About)
- After iOS updates: Reboot iPhone 16 to refresh eSIM connections
- Before travel: Test all profiles on Wi-Fi calling
- Critical: Enable “Automatic” under Settings > Cellular > Network Selection
Security Must-Dos
- Activate Find My iPhone to remotely lock eSIM profiles
- Use strong alphanumeric passcode (not just 6 digits)
- Enable two-factor authentication for your carrier account
- Never share eSIM QR codes—they’re like digital house keys
Your iPhone 16’s eSIM capability eliminates SIM card hassles permanently. From activating new service during your lunch break to adding international lines before vacation, these digital profiles put you in control. Start by transferring your primary line today—then add a business number or travel profile to experience true cellular freedom. The next time you land in Paris, your iPhone 16 will already be connected to local data without hunting for stores. That’s the power of mastering eSIM.


