
Your iPhone 16 Pro can now capture Hollywood-level footage using Log recording—a game-changer for mobile filmmakers. This flat color profile preserves incredible detail in highlights and shadows that standard video discards, giving you professional color grading flexibility. While Log footage looks dull straight from the camera, this intentional approach unlocks dynamic range comparable to $50,000 cinema cameras. Whether you’re creating YouTube documentaries or client commercials, mastering how to shoot log on iPhone 16 transforms your phone into a legitimate filmmaking tool. You’ll learn exact setup steps, exposure techniques that prevent blown highlights, and the color grading workflow that converts flat footage into cinematic gold—all without expensive gear.
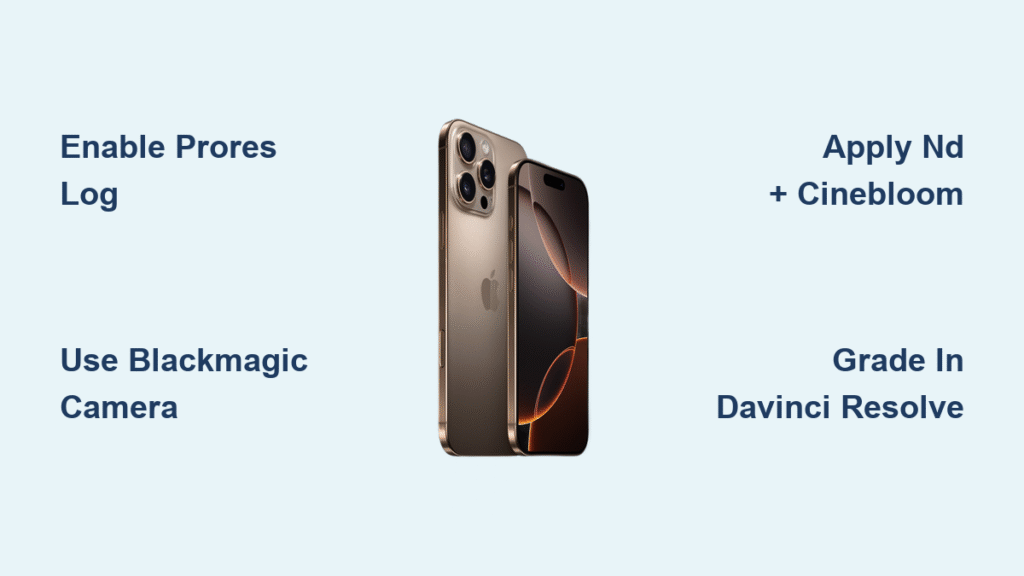
Activate ProRes Log in iPhone 16 Settings
Don’t waste time searching the Camera app—Log recording requires precise Settings configuration. Open Settings → Camera → Formats and scroll to the Video Capture section. Toggle Apple ProRes ON to unlock professional recording capabilities. This step is non-negotiable: Log only works with ProRes encoding enabled. Next, tap ProRes Encoding and select Log from the three options (HDR, SDR, or Log). Ignore misleading social media hacks—there’s no quick toggle in the Camera interface. You must return to Settings to switch profiles, so plan your shoots accordingly. Crucially, 60fps recording demands an external SSD via USB-C; the internal storage can’t handle these massive files alone. Verify your setup by checking the Camera app’s top-left corner for the ProRes indicator before rolling.
Why You Can’t Shoot Log Without ProRes
Apple’s ecosystem intentionally locks Log to ProRes for quality control. Attempting standard H.264 recording with Log profile will fail—your iPhone blocks this combination to prevent unusable footage. This limitation ensures you capture the 10-bit color depth required for professional grading. Remember: switching between Log and HDR requires reopening Settings mid-shoot, so batch similar scenes together. For 4K 30fps, internal storage works, but always connect an SSD for 60fps projects to avoid unexpected stoppages.
Configure BlackMagic Camera for Manual Control
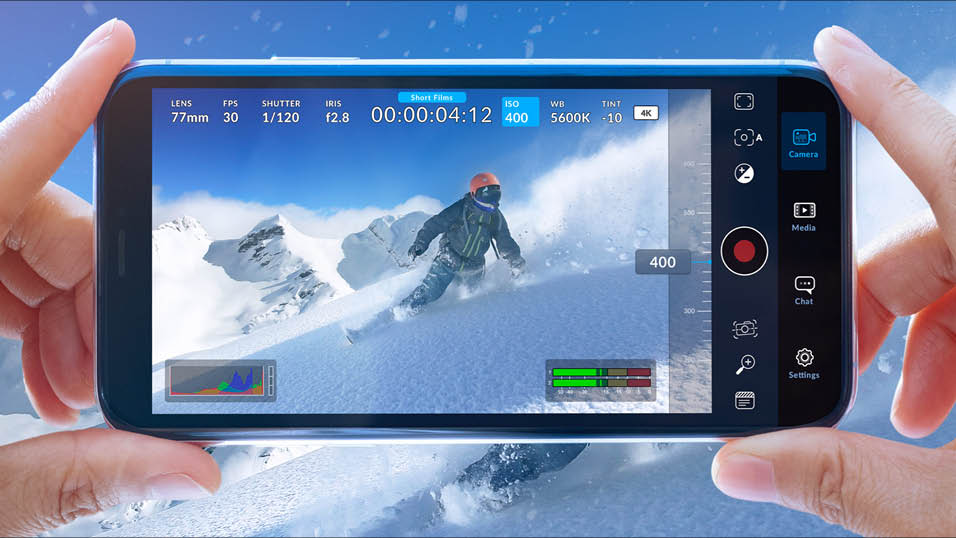
Download the free BlackMagic Camera app from the App Store to access cinema-grade controls identical to BlackMagic’s $2,000 Pocket Cinema Camera. Unlike Apple’s native app, this provides real-time manual adjustments critical for Log shooting. Launch the app and tap the Frame Rate icon—set 25fps with 1/50s shutter if you’re in PAL regions (Europe, Australia), or 30fps with 1/60s shutter for NTSC regions (Americas, Japan). This “double frame rate” shutter rule maintains natural motion blur while giving grading flexibility.
Enable Professional Exposure Tools
Tap the Tools menu and activate Zebra Stripes (set to 90-100 IRE) to flag clipped highlights instantly. Simultaneously enable the Histogram—your most reliable exposure guide for Log footage. The flat preview image lies; the histogram shows true data distribution. Position skin tones at 55-65 IRE for optimal exposure. Without these tools, you’ll overexpose highlights beyond recovery. Pro tip: Use the app’s waveform monitor if available—it’s even more precise than the histogram for critical shots.
Apply Essential Filters for Filmic Results

Skip this step and your Log footage will look clinical, not cinematic. Attach a variable ND filter directly to your iPhone lens to control light without touching shutter speed. Rotate the filter ring to dial in exposure—start at ND8 for outdoor noon shoots. This maintains your locked 1/50s or 1/60s shutter for proper motion blur. Never shoot Log without ND filtration; you’ll lose highlight detail even in moderate sunlight.
Stack CineBloom for Organic Highlights
Layer a 20% CineBloom diffusion filter over your ND filter (ND closest to lens). This isn’t just a soft-focus gimmick—it smooths harsh digital highlights into film-like glows while preserving sharpness. Unlike cheaper diffusion filters, CineBloom specifically targets highlights without milking skin tones. The result: organic-looking footage that mimics $10,000 cinema lenses. For low-light interiors, remove the ND but keep CineBloom—it adds subtle warmth missing in flat Log profiles.
Expose Log Footage Without Clipping Highlights
Your iPhone screen preview lies when shooting Log. Trust the histogram, not your eyes. Aim for a bell curve peaking at 50-65 IRE for midtones—never let highlights spike past 90 IRE. Overexposed highlights in Log are unrecoverable; the flat profile only saves detail up to the clipping point. For backlit scenes, expose for faces (55-65 IRE) even if backgrounds blow out slightly—you’ll recover more shadow detail than highlights in grading.
Combat Focus Challenges in Flat Profiles
Log’s low contrast makes manual focus treacherous. Enable Focus Peaking in BlackMagic Camera (red highlights on sharp edges) and zoom to 3x magnification before locking focus. Use a follow focus rig for moving subjects—your fingertip can’t maintain precision. Pro tip: Shoot test footage of textured surfaces (brick walls, fabric) to verify focus before critical takes. Never rely on autofocus; it hunts in flat profiles.
Grade Log Footage in DaVinci Resolve
Transfer files to DaVinci Resolve (free version) via USB-C—avoid wireless transfers that degrade quality. Create a new project and import your ProRes Log clips. The footage will look washed out; this is normal. Right-click your clip, select Open in Color Page, then apply Sir’s Apple Log-to-ARRI Rec.709 LUT as your first node. This converts the flat profile to standard contrast without burning into footage.
Layer Creative Film Looks
Add a second node and apply SERR’s FilmVision PowerGrade for authentic film stock emulation. Start with the “Kodak 2383” preset at 70% intensity to avoid oversaturation. Adjust individual color wheels: lift shadows slightly for filmic blacks, reduce green in midtones for natural skin, and add subtle blue to highlights. Log’s extended dynamic range lets you push these settings 2-3x harder than standard footage without banding. Export graded videos as H.264 at 50Mbps for YouTube to balance quality and file size.
When to Use Log vs. Standard Recording
Ideal Projects for iPhone 16 Log
Shoot Log for commercial work, narrative films, or any project requiring color consistency across multiple cameras. It shines in high-contrast scenarios like golden hour exteriors with interior subjects, where standard video clips window highlights. Log also saves time on multi-camera shoots—matching footage from DSLRs to iPhone becomes trivial with proper grading. If your project has dedicated post-production time, Log delivers noticeably richer shadows and smoother gradients.
Skip Log for Quick Social Content
Avoid Log for Instagram Reels, family events, or same-day edits. The mandatory color grading adds 15-30 minutes per clip—overkill for unedited vlogs. Standard video looks better straight from camera for casual use, and Log’s massive file sizes (up to 6GB/minute) will drain your storage. Remember: Log footage appears unwatchable without grading, so never send raw clips to clients expecting immediate review.
Manage Massive Log File Sizes

ProRes Log consumes 10-30x more storage than standard 4K video. A 5-minute clip can fill 3GB of space—your iPhone’s free space will vanish fast. Always connect a USB-C SSD (Samsung T7 recommended) before shooting. In Settings → Camera, set External Recording to your SSD. For critical projects, record simultaneously to internal storage AND SSD as backup. After shoots, immediately offload to cloud storage—don’t risk losing unrecoverable footage on a single drive.
Final Setup Checklist for iPhone 16 Log
Immediately enable ProRes Log through Settings → Camera → Formats for native 4K 30fps recording. Install BlackMagic Camera for manual controls and monitoring tools your iPhone lacks. Invest in a variable ND filter and 20% CineBloom—they’re cheaper than one day of professional camera rental. Learn DaVinci Resolve basics using free YouTube tutorials; the 15-minute investment pays off in usable footage. Remember: Log isn’t magic—it demands proper exposure and grading, but the cinematic results justify the effort. Your iPhone 16 Pro now rivals cinema cameras when you know how to shoot log on iPhone 16 correctly. Start small with 30-second tests, and you’ll soon capture footage indistinguishable from productions costing 100x more.


