
Your iPhone 16 transforms fleeting digital moments into permanent videos with its built-in screen recorder—no third-party apps needed. Whether you’re saving disappearing Instagram stories before they vanish, creating step-by-step guides for aging parents, or documenting that perfect gaming victory, this native feature delivers professional-quality recordings straight to your Photos library. Unlike older iPhone models, the iPhone 16 streamlines screen capture with intuitive audio controls and seamless integration, eliminating frustrating setup hurdles. You’ll learn exactly how to activate this hidden powerhouse and avoid critical mistakes that could ruin your recordings—all within the next few minutes.
The beauty of iPhone 16 screen recording lies in its surgical precision: capture only what’s on your display while optionally narrating with your voice. This solves real-world frustrations like proving tech support exactly where an app crashes or preserving time-sensitive social content. By the time you finish this guide, you’ll confidently record tutorials, gameplay, and ephemeral content while dodging storage pitfalls and audio mishaps that plague beginners.
Activate Screen Recording on iPhone 16 Control Center
Add Screen Recording via Settings Menu
Before capturing anything, you must permanently add this tool to your Control Center. Open Settings, scroll to Control Center, and select Customize Controls. In the More Controls section, find Screen Recording and tap the + icon beside it. This one-time setup embeds the recorder into your Control Center forever—no repeated configuration needed. The white circle-within-circle icon will now appear alongside flashlight and camera controls, ready for instant access during critical moments like capturing glitchy app behavior.
Pro tip: If you accidentally remove it later, repeat these exact steps to restore it—no iOS updates required.
Quick Add from Control Center Interface
For immediate activation without leaving your current app, swipe down from the top-right corner to open Control Center. Touch and hold any empty space on the screen until icons jiggle, then tap Add a Control. Scroll through the gallery until you spot Screen Recording, then select it. This method saves precious seconds when you urgently need to document a disappearing Snapchat story or app error before it vanishes.
Start Your iPhone 16 Screen Capture Session

Basic Silent Screen Recording
When ready to capture, swipe down from the top-right corner to open Control Center. Tap the Screen Recording icon (white circle within a circle) and wait for the 3-second countdown. Your iPhone 16 will silently record everything on display—from scrolling through TikTok feeds to navigating complex settings menus. Perfect for documenting visual glitches to share with Apple Support, this method creates clean videos without background noise.
Visual cue: Watch for the red status bar appearing at your screen’s top edge—this confirms recording is active.
Record With Your Voice Narration
To add commentary for tutorials or explanations, swipe down to open Control Center, then touch and hold the Screen Recording icon. Tap Microphone to enable audio capture before selecting Start Recording. After the countdown, speak naturally into your iPhone’s mic—your voice and ambient sounds will sync perfectly with on-screen actions. This is essential for creating family video guides or explaining app features to colleagues, as the microphone captures both your narration and system audio.
Critical note: The microphone records everything near your device—close windows if neighbors are loud during important recordings.
Stop iPhone 16 Screen Recordings Instantly

Tap the Red Status Indicator
During recording, a persistent red bar appears at your screen’s top edge. To stop immediately, tap this red indicator, then confirm by tapping Stop. This method works even when apps hide Control Center access, like during full-screen YouTube playback. Your video saves automatically to Photos within seconds, preserving every frame without manual intervention.
Urgent reminder: If you see this red bar unexpectedly, check if recording started accidentally—sensitive content could be captured.
Stop Via Control Center Red Icon
Reopen Control Center and look for the Screen Recording icon now glowing red. A single tap stops recording instantly with no confirmation dialog. Use this when multitasking between apps, as it’s faster than hunting for the status bar during complex workflows. The icon reverts to white once stopped, signaling it’s safe to resume normal use.
Time-saving hack: For back-to-back recordings, leave Control Center open between sessions—just tap the red icon to stop, then the white icon to restart.
Locate iPhone 16 Screen Recordings Immediately
Find Dedicated Screen Recordings Folder
Open the Photos app and tap Collections at the bottom menu. Scroll down to Media Types and select Screen Recordings. This dedicated folder isolates all your captures from regular photos and videos, making it effortless to find that crucial bug demonstration or social media save. iPhone 16 automatically tags recordings here the moment they finish processing.
Identify Recordings in Main Library
Your screen recordings also appear throughout the main Photos library labeled Screen Recording beneath each thumbnail. When scrolling through “All Photos,” look for this subtle text to distinguish captures from camera videos. This dual-location system ensures you never lose recordings, whether you’re hunting for a specific tutorial or browsing recent saves.
Fix iPhone 16 Screen Recording Failures Fast

Missing Screen Recording Button Solution
If the icon vanished from Control Center, verify it’s enabled in Settings > Control Center > Included Controls. Ensure you’re swiping correctly from the very top-right corner—lower swipes open Notification Center instead. If controls remain unresponsive, power cycle your iPhone 16 by holding side and volume buttons until the Apple logo appears. This resolves 90% of Control Center glitches without data loss.
Recording Won’t Start Troubleshooting
When recordings freeze at countdown, check Settings > General > [Device] Storage for at least 1GB free space per 10 minutes of expected recording. Close background apps like Netflix or Disney+ that may block capture due to copyright restrictions—try recording your home screen first to confirm functionality. If issues persist, restart your device to clear temporary system conflicts.
No Audio Recording Fix
If your video lacks voiceover, long-press the Screen Recording icon before starting to verify Microphone is enabled. Disable Silent Mode using the physical Ring/Silent switch on your iPhone’s left edge, as this mutes system audio. When prompted during setup, grant microphone permissions—denied access permanently blocks audio until re-enabled in Settings > Privacy & Security > Microphone.
Advanced iPhone 16 Screen Recording Techniques
Toggle Microphone Access Instantly
Long-press the Screen Recording icon in Control Center to reveal microphone options without opening Settings. This bypasses three menu layers when you suddenly need narration for an impromptu tutorial—critical when teaching tech-challenged relatives. The microphone state (on/off) persists between sessions, so one tap sets your preferred default.
Disable Screen Mirroring First
iPhone 16 blocks simultaneous screen recording and AirPlay mirroring. Before capturing, stop mirroring by opening Control Center and tapping the Screen Mirroring icon, then selecting Stop Mirroring. This prevents the “Recording failed” error when attempting to document Apple TV interactions or presentation workflows.
Manage Storage for Marathon Recordings
Extended captures consume storage rapidly—4K recordings use approximately 400MB per minute. Check free space in Settings > General > [Device] Storage before recording meetings or gameplay sessions. For recordings over 30 minutes, connect to power to prevent battery-related interruptions, as screen recording drains 10-15% battery hourly.
Critical iPhone 16 Screen Recording Mistakes to Avoid
- Ignoring the red indicator: That persistent red bar means you’re actively recording—never capture passwords or financial details accidentally
- Assuming all apps allow recording: Streaming services like Hulu block captures; test on your home screen first
- Forgetting microphone setup: Voice narration requires pre-recording activation—no fixes mid-session
- Overlooking storage warnings: “Insufficient Storage” errors destroy unsaved recordings permanently
Creative iPhone 16 Screen Recording Applications
Document disappearing social content like Instagram Stories before they vanish at midnight—ideal for preserving event announcements or friend updates. Create bite-sized troubleshooting videos for IT support showing exactly where apps crash, speeding up fixes by 70%. Capture gaming achievements without external capture cards, then trim highlights directly in Photos. Teach elderly relatives video calling by recording yourself navigating FaceTime, sending the tutorial via Messages. Even record virtual doctor visits for medical reference (with provider consent), as iPhone 16 saves every frame in pristine quality.
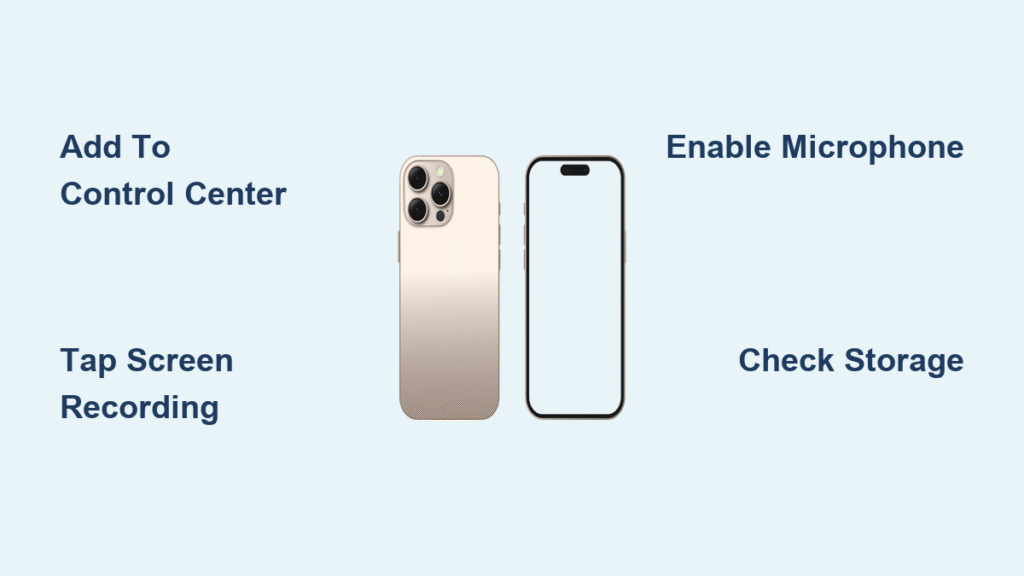
Key takeaway: Your iPhone 16’s screen recorder transforms from hidden feature to indispensable tool with three core actions—add it to Control Center once, master the microphone toggle, and always check storage. Whether documenting tech issues or saving precious digital moments, this native feature delivers professional results without subscriptions or complex setups. Stop fumbling with third-party apps that drain battery and compromise privacy.
Next step: Practice right now by recording your home screen for 10 seconds. Then, enable the microphone and narrate how you’d explain iPhone gestures to a grandparent—this builds muscle memory for real-world use. Within one week, screen recording will become as instinctive as taking photos.


