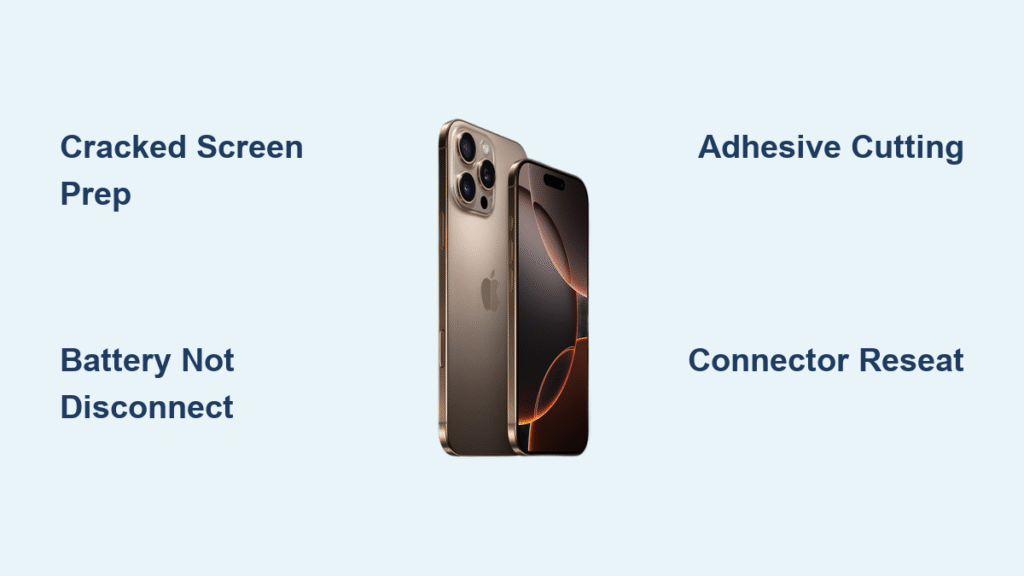
That familiar crunch under your fingers when you drop your iPhone 16 Pro—it’s enough to make anyone’s heart sink. A cracked screen doesn’t mean you’re stuck with an expensive trip to the Apple Store. How to replace iPhone 16 Pro screen successfully at home is entirely possible with the right approach. Unlike previous models, the iPhone 16 Pro presents unique repair challenges that demand careful attention, especially since the battery remains connected throughout the process.
Following this step-by-step guide ensures you’ll complete your screen replacement safely while maintaining all original functionality. The key is understanding the iPhone 16 Pro’s specific design elements that differ from older models—particularly the inability to disconnect the battery before starting. With proper preparation and systematic execution, you’ll restore your device to pristine condition without risking costly damage.
Critical Safety Warnings
Never use metal tools near electrical components during this repair. Since the iPhone 16 Pro battery cannot be disconnected, any accidental contact between metal implements and internal contacts could cause a dangerous short circuit or permanent damage to your device. Always use plastic opening picks and keep metal tools away from exposed circuitry.
Shattered glass requires immediate protection. Before attempting any disassembly on a cracked screen, apply multiple overlapping strips of packing tape across the entire display surface. This simple step prevents glass shards from causing injury and creates a smooth surface for your suction tools to grip effectively.
Adhesive cutting demands patience. Rushing through the adhesive separation process risks damaging delicate display cables or frame components. Work methodically around each edge, reheating as needed, and never force separation when resistance is encountered.
Required Tools and Parts
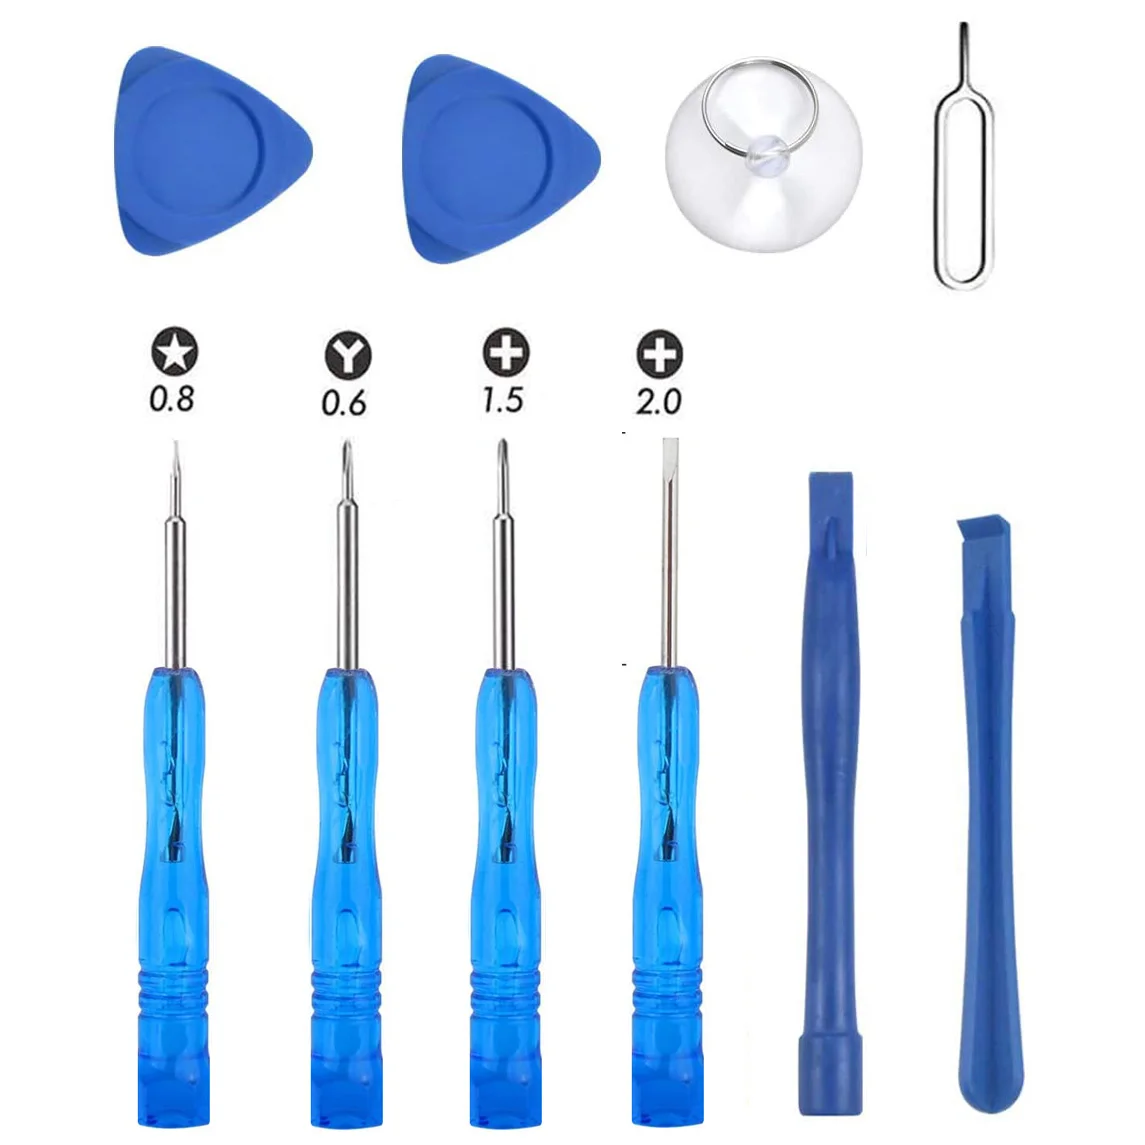
Essential Repair Tools
- P2 pentalobe screwdriver – specifically for the bottom edge screws (7.4mm length)
- Tri-point Y000 driver – must-have for internal connector covers
- Strong suction handle – for creating initial screen separation
- Multiple plastic opening picks – at least three recommended for maintaining separation
- Precision spudger – for connector disconnection without damage
- Fine-tip tweezers – essential for handling tiny components
- Heat source – hair dryer, heat gun, or dedicated iOpener ($14.99)
- Packing tape – absolutely required for cracked screens
Consumables Needed
- Authentic Apple screen assembly – ensures full calibration compatibility with True Tone and Face ID
- Replacement adhesive strips – critical for restoring water resistance after repair
Pre-Repair Screen Assessment
Cracked screen preparation starts with applying overlapping packing tape strips across the entire glass surface. Focus on damaged areas while ensuring complete coverage—this protects your hands from glass shards and provides traction for your suction tools. Work carefully to avoid pressing too hard on already compromised sections.
Smooth area creation near the bottom edge is essential for proper suction cup adhesion. Leave a 2-inch square section free of tape where you’ll position your suction handle. This area must be smooth enough to maintain consistent suction throughout the opening process—any imperfections here could jeopardize your entire repair attempt.
Remove Bottom Screws
Pentalobe screw removal requires your P2 driver to extract the two 7.4mm screws beside the USB-C port. These specialized screws secure the display assembly to the frame and must be completely removed before attempting any separation. Turn counterclockwise with steady pressure—don’t force them if they resist.
Screw organization prevents costly mistakes later. Place these bottom screws in a separate container labeled “bottom screws” to avoid mixing them with the smaller internal screws you’ll encounter during disassembly. Keeping components organized saves time and prevents assembly errors.
Create Initial Screen Separation
Suction placement determines your success from the start. Position your handle on the prepared smooth area near the bottom edge, applying firm, steady upward pressure—not sideways force. This initial separation creates the crucial gap needed for inserting your opening tools.
Gap creation demands patience. Hold consistent pressure for 30-60 seconds until you see a 1-2mm gap appear. If suction fails repeatedly, reheat the bottom edge and try again. Never force separation, as this damages display cables or frame components—remember, slow and steady wins this race.
Cut Adhesive Systematically
Bottom Edge Cutting
Insert an opening pick into the gap once created, sliding it 2-3mm into the device. Hold this pick in place as a wedge while working additional picks around the perimeter. This prevents the adhesive from resealing as you progress toward the corners.
Heating Sequence Pattern
Left edge heating comes first using your heat source. Apply heat until the area becomes hot to touch (approximately 90-100°C). Work quickly—heat softens adhesive for only 30-60 seconds before cooling and hardening again.
Systematic progression follows: left edge → top edge → right edge → bottom edge. Reheat each edge before cutting, maintaining consistent temperature throughout. Cold adhesive tears rather than cuts cleanly, risking component damage.
Open Screen Like a Book
Hinge position occurs on the left side—swing the screen open from the right edge toward the left. The display remains connected via ribbon cables on the left side, so never attempt complete removal at this stage.
90-degree angle provides optimal access to internal connectors while preventing cable strain. Support the screen with your hand or a small box to maintain this angle throughout connector disconnection—any excessive movement could damage these delicate connections.
Disconnect Display Cables
Connector Cover Removal
Two connector covers protect the display and sensor connectors, secured by 1.3mm tri-point screws. Use your Y000 driver to remove both screws, storing them separately from bottom screws. Lift each cover using tweezers, grasping near the screw hole for clean removal.
Cable Disconnection Sequence
Display connector disconnects first using your spudger’s tip. Pry up gently from underneath, applying even pressure across the connector’s width. This connector provides video signal—damage here causes permanent display failure.
Sensor connector follows the same careful process. This smaller connector handles Face ID and proximity sensors, requiring identical gentle handling. Both connectors must be fully seated during reassembly for complete functionality.
Clean Frame Thoroughly
Adhesive removal demands complete elimination of old material. Use your spudger or tweezers to scrape away adhesive chunks, working carefully around fragile grounding clips positioned around the frame perimeter.
Grounding clip protection prevents connectivity issues. If any clips bend during cleaning, gently reshape them using tweezers. These clips ensure proper electrical grounding between screen and frame—bent clips cause intermittent functionality problems.
Install New Adhesive
Dry Fit First
Adhesive positioning requires a test placement before removing backing. Lay the adhesive sheet over the frame, using the camera cutout as your alignment guide. This prevents misalignment that compromises water resistance.
Precise Application
Perimeter placement follows the frame’s exact path without gaps or overlaps. The adhesive creates both structural integrity and water resistance—any imperfections reduce both properties significantly.
Pressure application ensures proper adhesion throughout the frame. Use firm, even pressure across all adhesive areas before removing the top protective layer.
Install New Screen
Connector Reconnection
Sensor connector attaches first, followed by the display connector. Each must click into place with minimal force—never force connections, as this damages pins or cables.
Connector cover reinstallation protects against electromagnetic interference. Tuck each cover’s tab into its corresponding frame cutout before securing with tri-point screws.
Screen Alignment
Top clip engagement occurs first—align the screen’s top edge with frame cutouts before lowering into position. Proper alignment prevents gaps that compromise water resistance and structural integrity.
Perimeter seating requires checking all edges align correctly before adhesive activation. Any misalignment at this stage requires complete removal and reinstallation.
Activate Adhesive Bond
Heat application activates adhesive throughout the perimeter. Apply heat until the area becomes slightly too hot to touch, working systematically around all four edges.
Pressure sequence follows immediately after heating. Use your fingers to squeeze firmly around the entire iPhone perimeter, maintaining consistent pressure for 30-60 seconds. This creates the permanent bond essential for water resistance.
Final Assembly Steps
Bottom screw reinstallation completes physical assembly. Replace the two 7.4mm pentalobe screws beside the USB-C port using your P2 driver. These screws provide final structural connection between screen and frame—don’t overtighten them.
Calibrate New Display
Apple’s Repair Assistant requires immediate attention after physical assembly. Navigate to Settings → General → About → Parts & Service History, then tap Restart & Finish Repair. Follow all on-screen prompts for authentic Apple screens—this calibration ensures True Tone, automatic brightness, and full color accuracy.
Calibration failure symptoms include washed-out colors, missing True Tone, or automatic brightness issues. These indicate improper calibration or non-Apple parts requiring additional steps.
Troubleshooting Common Issues
Display won’t power on usually results from improperly seated display connectors. Reopen the device and ensure both connectors click fully into place.
Face ID failure indicates sensor cable damage or misconnection. Check the front sensor connector for proper seating and inspect cables for tears or pinches.
Touch sensitivity problems stem from display connector issues or damaged cables during installation. Verify connector alignment and inspect for cable damage.
E-Waste Disposal
Responsible disposal requires certified recycling. Take your old screen and packaging to R2 or e-Stewards certified facilities. These certifications guarantee proper electronic waste handling and component recycling—never discard electronic components in regular trash.
Your iPhone 16 Pro now features a pristine new screen ready for daily use. The authentic Apple replacement maintains all original functionality including Face ID, True Tone, and water resistance. Monitor the repair area over the next few days for any adhesive separation or functionality issues. If you followed these steps for how to replace iPhone 16 Pro screen correctly, you’ve saved significant money while gaining valuable repair experience that could serve you well with future devices.