
Your iPhone 16 screen suddenly goes black mid-update, flashing the Apple logo repeatedly before dying again. Panic sets in as you realize your photos, messages, and critical work files might be trapped in this frozen state. Before scheduling an expensive Apple Store visit, know this: learning how to put iPhone 16 in recovery mode could save your device—and your data—in under 30 minutes. This guide delivers the exact button sequences, computer requirements, and troubleshooting fixes you need to rescue your iPhone 16 from software limbo. You’ll discover why standard restarts fail, when to choose “Update” versus “Restore,” and how to avoid permanent data loss.
Establish Your iPhone 16 Recovery Mode Connection
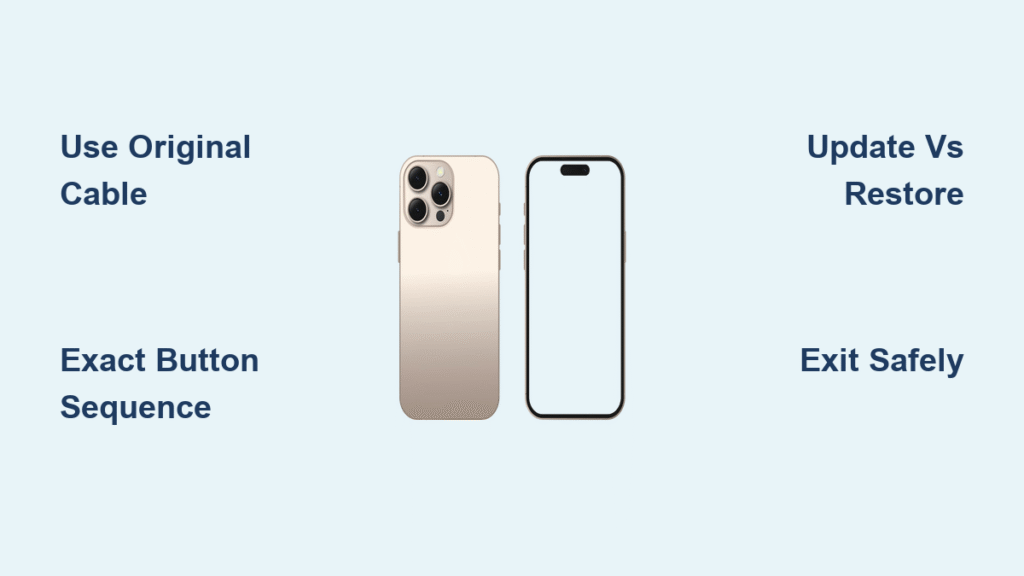
Use your original USB-C cable—third-party alternatives often fail during recovery mode procedures. Connect your iPhone 16 directly to your computer’s USB-C port (avoid hubs or extensions). If this is your first connection, complete the trust process before attempting recovery mode:
- Tap “Trust” on your iPhone screen when prompted
- Enter your device passcode immediately
- Click “Allow” on macOS security popups
- Confirm “Trust” in Finder (macOS Catalina+) or iTunes
Critical mistake to avoid: Skipping trust verification. A failed trust relationship prevents your computer from recognizing the device in recovery state, causing endless “Connect to Computer” screen loops. If your iPhone shows the recovery mode screen but your computer doesn’t detect it, disconnect, reconnect, and complete trust steps before proceeding.
How to Put iPhone 16 in Recovery Mode: The Exact Button Sequence
Timing errors cause 90% of recovery mode failures. Follow this sequence precisely—rushing triggers normal startup instead of recovery mode:
- Press Volume Up quickly and release (1 second press)
- Press Volume Down quickly and release (1 second press)
- Press and hold Side button (right edge power button)
- Keep holding through Apple logo appearance
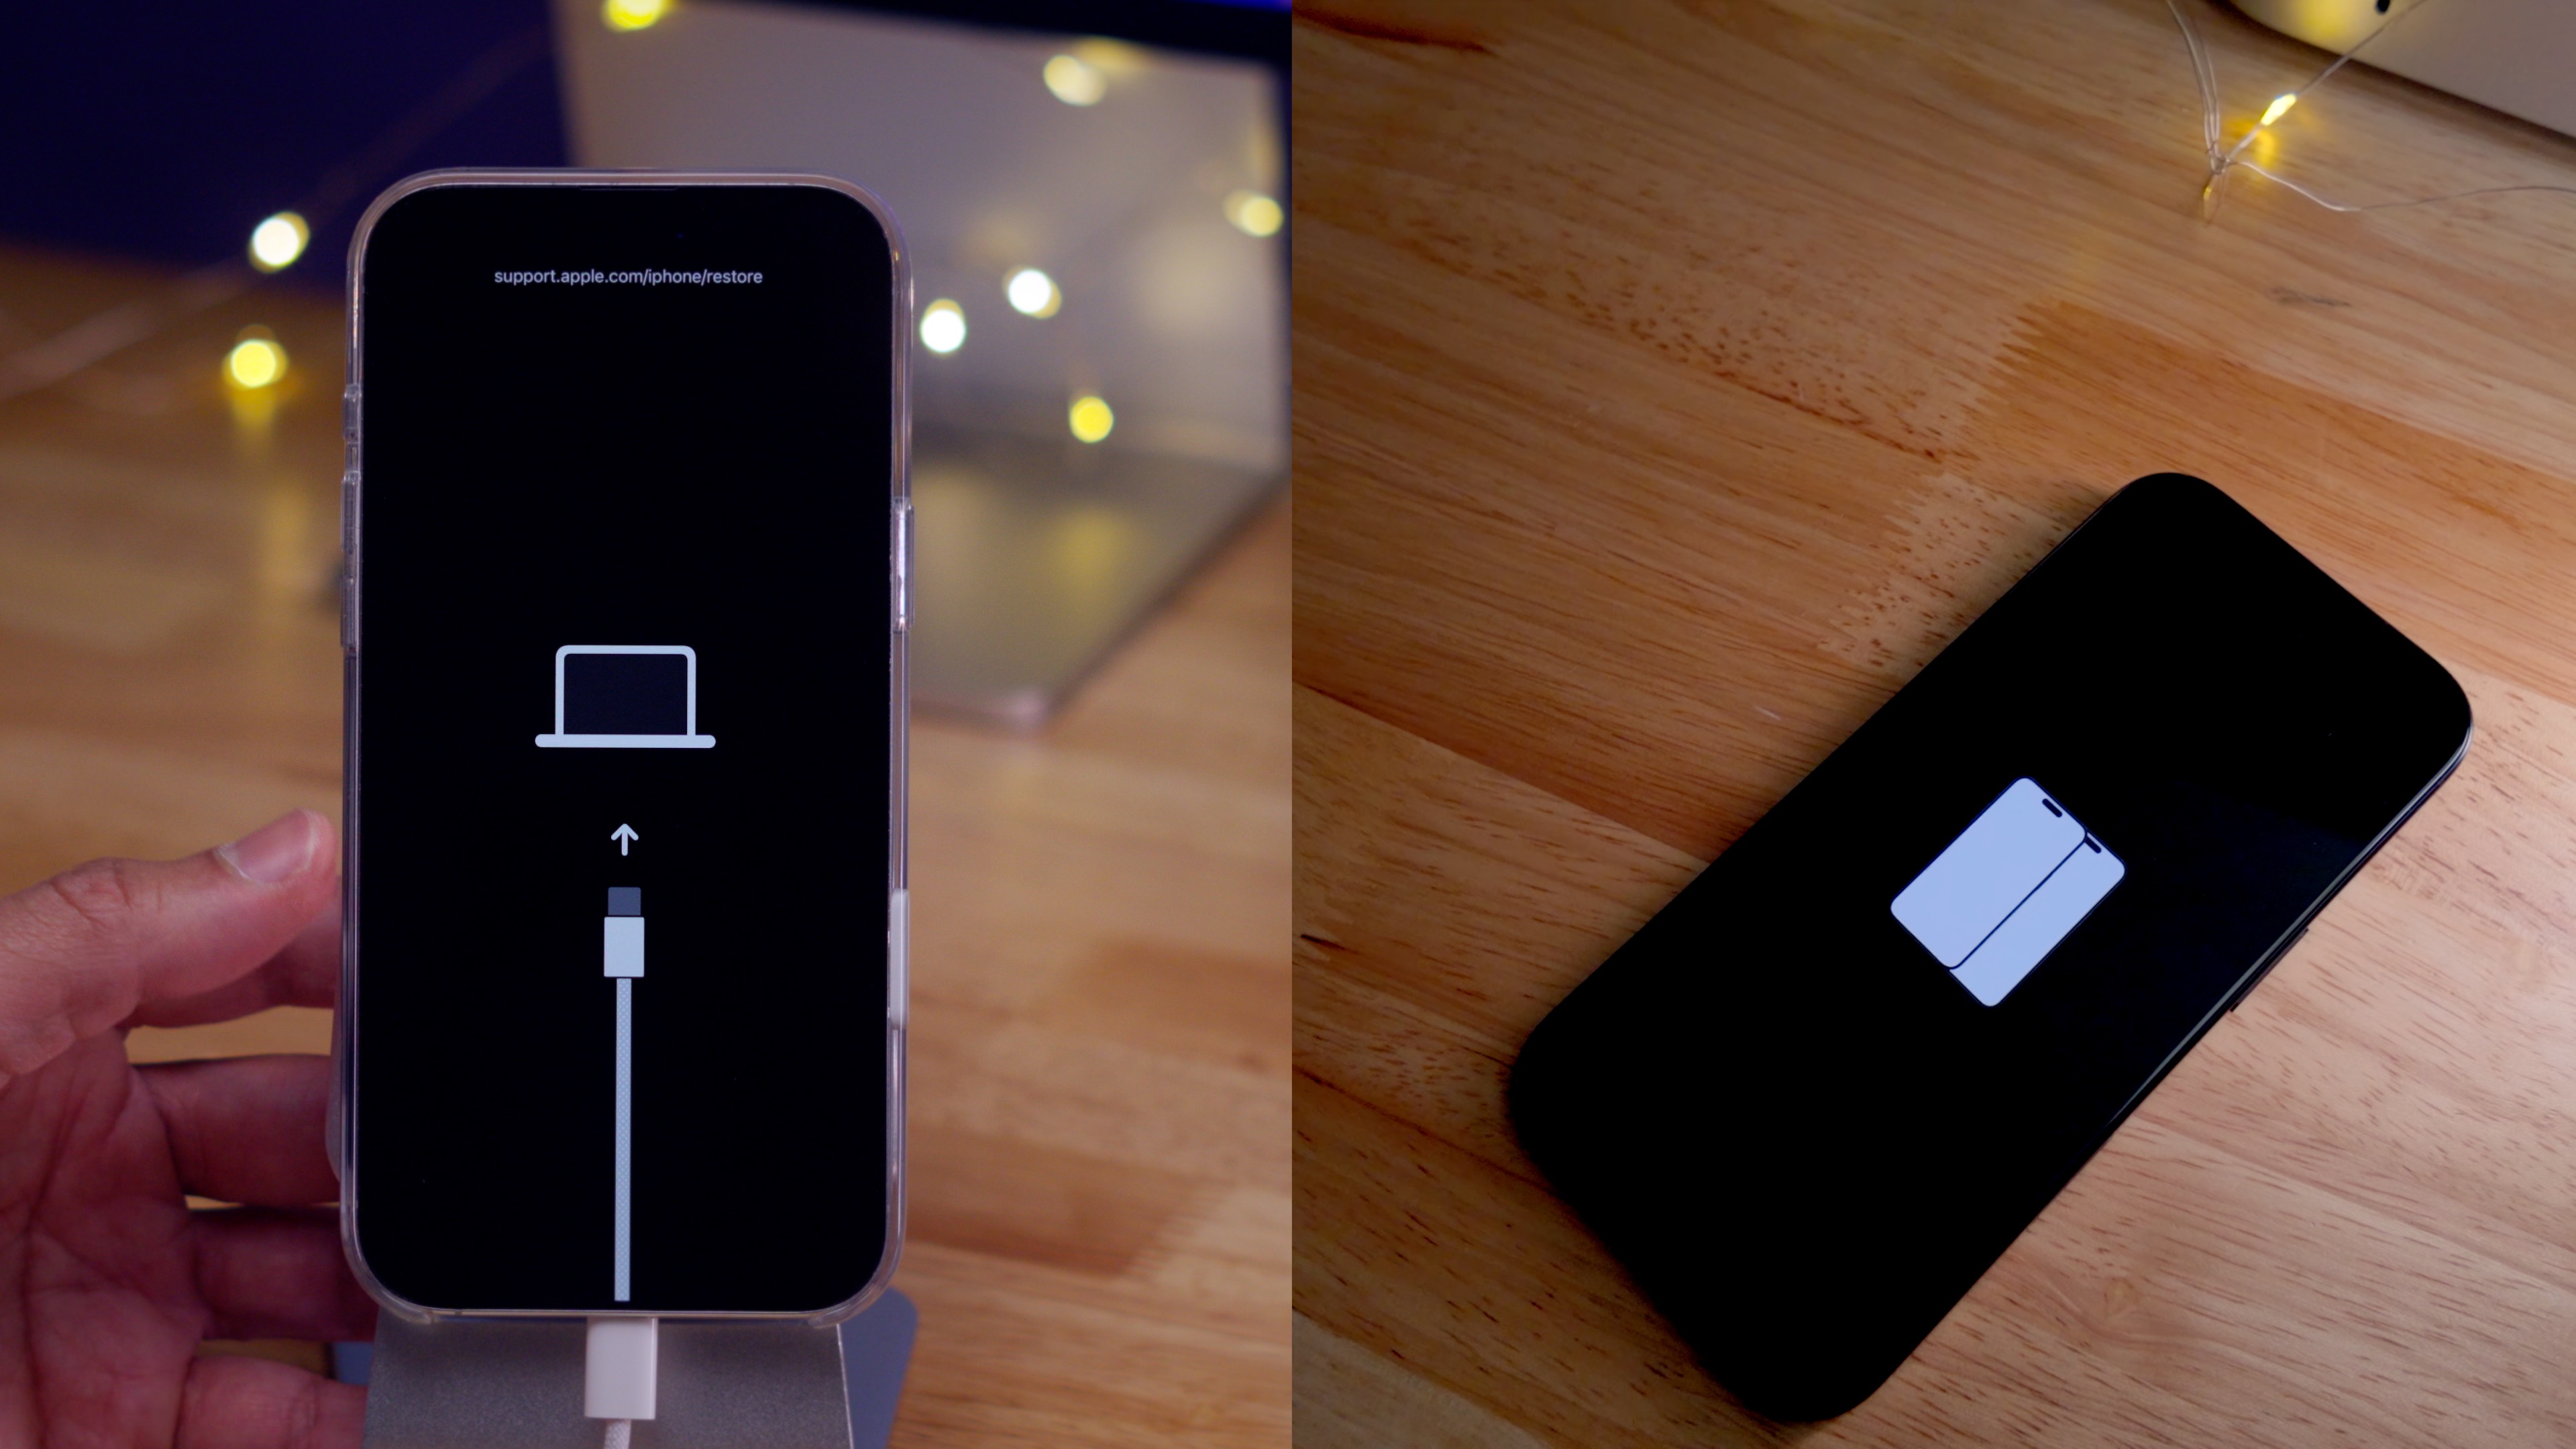
- Release only when computer icon with cable appears
Visual confirmation checklist:
– Screen transitions: Black → Apple logo (5-7 seconds) → Connect-to-computer screen
– Finder/iTunes instantly displays “Update” or “Restore” options
– Computer recognizes device within 10 seconds of screen change
Pro tip: If you see the Apple logo for more than 10 seconds, restart the sequence. The connect-to-computer screen must appear within 15 seconds of releasing the Side button. Practice the timing once with your device powered on to build muscle memory.
Update vs. Restore: Critical Recovery Mode Choices
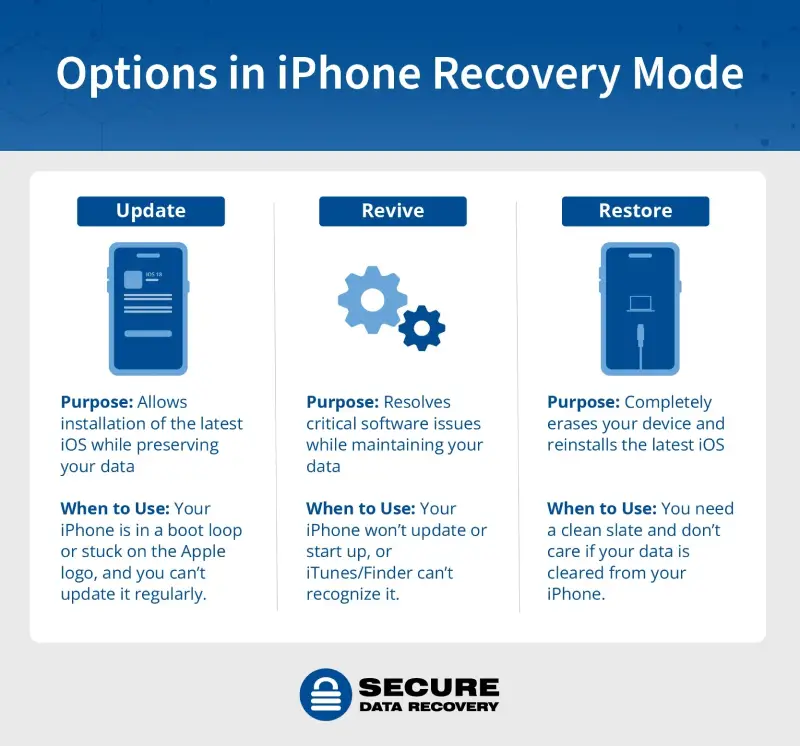
Your computer presents two irreversible options once recovery mode activates. Choosing wrong risks permanent data loss.
Preserve Data With iPhone 16 Update Option
Select “Update” when:
– iOS update failed mid-process
– Device freezes at Apple logo
– You can’t reach Lock Screen normally
– System corruption prevents boot
What happens: Your computer downloads the latest iOS version (15-30 minute process) and reinstalls it while keeping all photos, apps, and settings intact. This is your safest first attempt—only proceed to Restore if Update fails twice.
When iPhone 16 Restore Is Necessary
Choose “Restore” only when:
– Update attempts repeatedly fail
– Preparing to sell or gift your device
– Severe boot loops persist after multiple Updates
– You have recent iCloud/computer backups
Critical warning: This permanently erases everything—photos, messages, app data. Never select Restore without verifying a backup exists. The process takes 25-45 minutes, during which your iPhone appears completely dead (normal behavior).
Exit iPhone 16 Recovery Mode Without Data Loss
Sometimes you’ll need to exit recovery mode safely—perhaps after a false alarm or before attempting a different fix. Forced shutdowns risk firmware corruption.
Physical exit method (recommended):
1. Disconnect USB-C cable
2. Press and hold Side button
3. Release when Apple logo appears (after 10-15 seconds)
4. Wait 2 minutes for full reboot to Lock Screen
Computer exit method:
– In Finder/iTunes, click “Exit Recovery Mode”
– Device restarts automatically within 20 seconds
– Success indicator: Normal Lock Screen appears within 3 minutes
Never force-restart during recovery mode—this can brick your device if iOS files are partially installed.
Advanced iPhone 16 Recovery Features
Wireless Recovery Mode via iOS 18
Exclusive to iPhone 16 models running iOS 18, this bypasses cable failures during boot loops:
- Ensure stuck iPhone shows connect-to-computer screen
- Quick-press Volume Up → Volume Down → hold Side button until black
- Rapidly tap Side button 5-7 times until Apple logo flickers
- Watch for proximity animation (pulsing circles) on recovery screen
- On nearby iOS 18 iPhone, tap “Restore Nearby iPhone”
- Enter verification code from recovery device
- First select “Exit Recovery Mode”—only use “System Recovery” if issues persist
Requirements: Working iPhone must stay on Wi-Fi; devices must remain within 12 inches; recovery iPhone needs power connection.
DFU Mode for Critical iPhone 16 Failures
Use Device Firmware Update (DFU) mode when standard recovery fails—this fixes firmware-level corruption:
- Connect to Mac via USB-C
- Quick-press Volume Up → release
- Quick-press Volume Down → release
- Hold Side button 10 seconds
- While holding Side, press Volume Down 5 seconds
- Release Side but keep holding Volume Down 10 seconds
- Screen stays completely black (no logos)
Exit DFU: Quick-press Volume Up → Volume Down → hold Side until Apple logo. Warning: DFU erases all data—only attempt after failed Updates.
Fix iPhone 16 Recovery Mode Connection Failures
Cable and Port Troubleshooting
When computer won’t detect iPhone:
– Swap to original Apple USB-C cable (tested with another device)
– Try direct computer ports—never use hubs
– Clean USB-C port with toothpick (debris blocks connections)
– Test ports with another device to rule out computer issues
Critical check: On Mac, open System Information → Hardware → USB. If iPhone doesn’t appear here, the connection is physically broken.
Button Malfunction Solutions
If volume/side buttons feel sticky:
– Clean around buttons with soft brush
– Press firmly through full range of motion
– Test buttons in Settings → Accessibility → Button Controls
– If unresponsive: Recovery mode requires functional buttons—seek service
Workaround for broken buttons: Professional technicians can enter recovery mode via software tools, but DIY options don’t exist.
Backup Before iPhone 16 Recovery Mode
Recovery mode won’t erase data—but Restore will. Always backup first when possible:
iCloud backup (5-minute method):
1. Settings → [Your Name] → iCloud → iCloud Backup
2. Tap “Back Up Now”
3. Verify completion time under backup settings
4. Critical: Ensure Wi-Fi and power before starting
Computer backup (saves passwords/health data):
1. Connect iPhone → Open Finder (Mac) or iTunes (PC)
2. Select device → Check “Encrypt backup”
3. Click “Back Up Now”
4. Never skip encryption—unencrypted backups omit critical data
If device won’t turn on: Restore from your most recent backup after recovery mode completes.
When iPhone 16 Recovery Mode Fails: Next Steps
Seek professional help immediately if:
– Physical damage is visible (cracks, water exposure)
– Buttons are broken beyond cleaning
– Device enters recovery loop after multiple attempts
– DFU mode fails three times
Before Apple Store visit:
– Document exact error messages and timeline
– Bring your computer if recognition issues persist
– Note iOS version (Settings → General → About)
Free troubleshooting resources:
– Apple Support article: “If you can’t update or restore your iPhone”
– Apple Support app on another iOS device (guided diagnostics)
– Genius Bar appointment via Apple ID (faster than walk-ins)
Maintain Your iPhone 16 After Recovery
Prevent future recovery mode emergencies:
– Keep iOS updated: Settings → General → Software Update
– Maintain 10%+ free storage: Low space causes update failures
– Weekly backups: Enable iCloud Auto Backup or weekly computer backups
– Monitor battery health: Settings → Battery → Battery Health (below 80% risks shutdowns)
Pro tip: After successful recovery, reset all settings (Settings → General → Transfer or Reset → Reset All Settings) to clear residual software conflicts without data loss.
Knowing how to put iPhone 16 in recovery mode transforms a potential data disaster into a 20-minute fix. By mastering these precise button sequences, understanding the critical Update vs. Restore decision, and recognizing when professional help is needed, you’ve gained essential knowledge that could save hundreds in repair costs. Bookmark this guide—should your iPhone 16 ever freeze mid-update again, you’ll be ready to act confidently and preserve your valuable data. Remember: regular backups make recovery mode a safety net, not a crisis.


